Upgrade Your Surveillance: A Comprehensive Guide to Replacing Your Security Camera
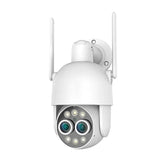
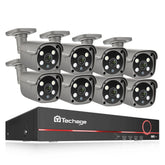
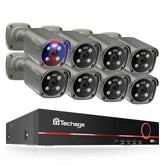
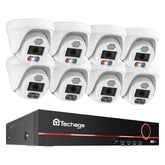
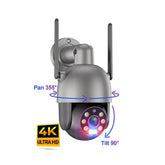
In this blog post, we’ll walk you through the process of replacing a broken WiFi camera from a Hiseeu 3MP Wireless Camera System with a Techage 3MP Wireless Camera. Both cameras belong to the same system .For example, if your old kit wrok on Xmeye apps or Eseecloud. Then new wifi kit should support too. Here’s how you can do it seamlessly.
When to Replace Your Security Camera
Before we dive into the replacement process, it’s important to know when to replace your security camera. Common signs include:
- Malfunctioning Hardware: The camera no longer powers on or frequently disconnects.
- Poor Image Quality: The video feed is consistently blurry or distorted.
- Outdated Technology: The camera lacks features such as night vision or motion detection.
- Physical Damage: The camera is visibly damaged or has been exposed to harsh weather conditions.
Step-by-Step Guide to Replacing Your Security Camera
Step 1: Power Connection
The first step is to connect the new Techage camera and the existing NVR (Network Video Recorder) to power sources. Make sure both devices are properly plugged in and receiving power.
Step 2: Connect the NVR to a Display
Next, connect the NVR to a display screen. Once powered on, the NVR menu should appear immediately. This menu is where you’ll manage your camera settings.
Step 3: Automatic Configuration
One of the best features of the Techage system is its ability to automatically configure new cameras. Once connected, the new Techage camera should be detected and configured automatically by the NVR, simplifying the setup process
Step 4: Reset Existing Hiseeu Cameras
If you’re integrating your existing Hiseeu cameras into the Techage system, you’ll need to reset them first. Use the Hiseeu computer software to reset each camera to its default settings.
Step 5: Adding Existing Cameras to the System
After resetting, follow these steps to add the Hiseeu cameras to your Techage system:
- Access the NVR menu on your display screen.
- Navigate to the camera setup section.
- Search for available cameras.
- Add the reset Hiseeu cameras to the system by following the on-screen instructions.
Step 6: Connect to WiFi
Ensure all your devices, including the Techage and Hiseeu cameras, are connected to your WiFi network. This step is crucial for remote monitoring and accessing the camera feeds from anywhere.
Step 7: Monitor in Real-Time
Finally, you can monitor your cameras in real-time using either the EseeCloud app or the IP Pro app. Both apps support the Techage and Hiseeu cameras, allowing you to continue using the familiar interface while enjoying the enhanced features of the Techage system.
Key Benefits of This Setup
Seamless Integration: The Techage camera integrates smoothly with your existing Hiseeu system.
User-Friendly Apps: Continue using the IP Pro and EseeCloud apps for real-time monitoring.
Automatic Configuration: The Techage NVR simplifies the setup with automatic camera configuration.
Flexibility: Easily add or replace cameras without extensive technical knowledge.
Conclusion
Replacing a broken WiFi camera doesn’t have to be a hassle. By following these steps, you can seamlessly integrate a Techage 3MP Wireless Camera into your Hiseeu system. This process ensures your home security remains robust and reliable without having to overhaul your entire setup. Enjoy the enhanced features and continue monitoring your home with ease.








1 comment